
The problem with my blog is that it has taken me so long to get it up and running that it looks like I did this texture work this morning when in truth I have been working on this for over a week. I think once I have the 'blog' thing sorted out and I am not playing 'catch up' with my posts it will all make more sense.
Anyway I have reached textures. I was a little nervous about this because it was clear that I would need to draw something which looked like it was supposed to. This is not my forte. I have to say though, that I have enjoyed working on this very much.
The picture above is some quick sketches that I did to start thinking about describing texture. I wanted to have a go before I started on the exercises to see if a little practice would make me relax a little. I feel that the sketch of the feather in the centre of the picture worked out fairly well. It was a very fluffy feather which moved in the slightest of breezes and I wanted to capture that, I am not sure that I managed to though.
Exercise 1 asked for marks made to describe texture from images. Some examples of my work are below.


I found that the inherent problem of trying to describe texture from images is that you can't actually reach out and feel the texture. Maybe it's the 'sewer' in me but the first thing I do when I am looking at anything is reach out and 'feel' it between my fingers. Non-sewing friends and family have commented on this strange habit of mine often, but any sewer reading this knows exactly what I am talking about. That top may fit beautifully and be the perfect colour but if the feel of the fabric isn't right then it stays on the hanger in the shop!
I tried to get around this problem by taking some time to imagine what the texture would feel like. In the case of my own photographs I tried to remember. For example, with the bottom image I remember the day that I took that photograph - it was so cold that the frost felt sharp. I tried to get this feeling into my sketches.
Some of the sketches worked out better than others. The top picture shows my attempt to describe the way the tree branches have wound around the trunk. I think this is a pleasing little sketch but I would like to try it again with the intention of getting more of the rough and curly aspects of the texture to show. On this same page the sketch which is taken from The elements of design suffers from the fact that I don't even know what the texture is and therefore have no idea how accurate it is.
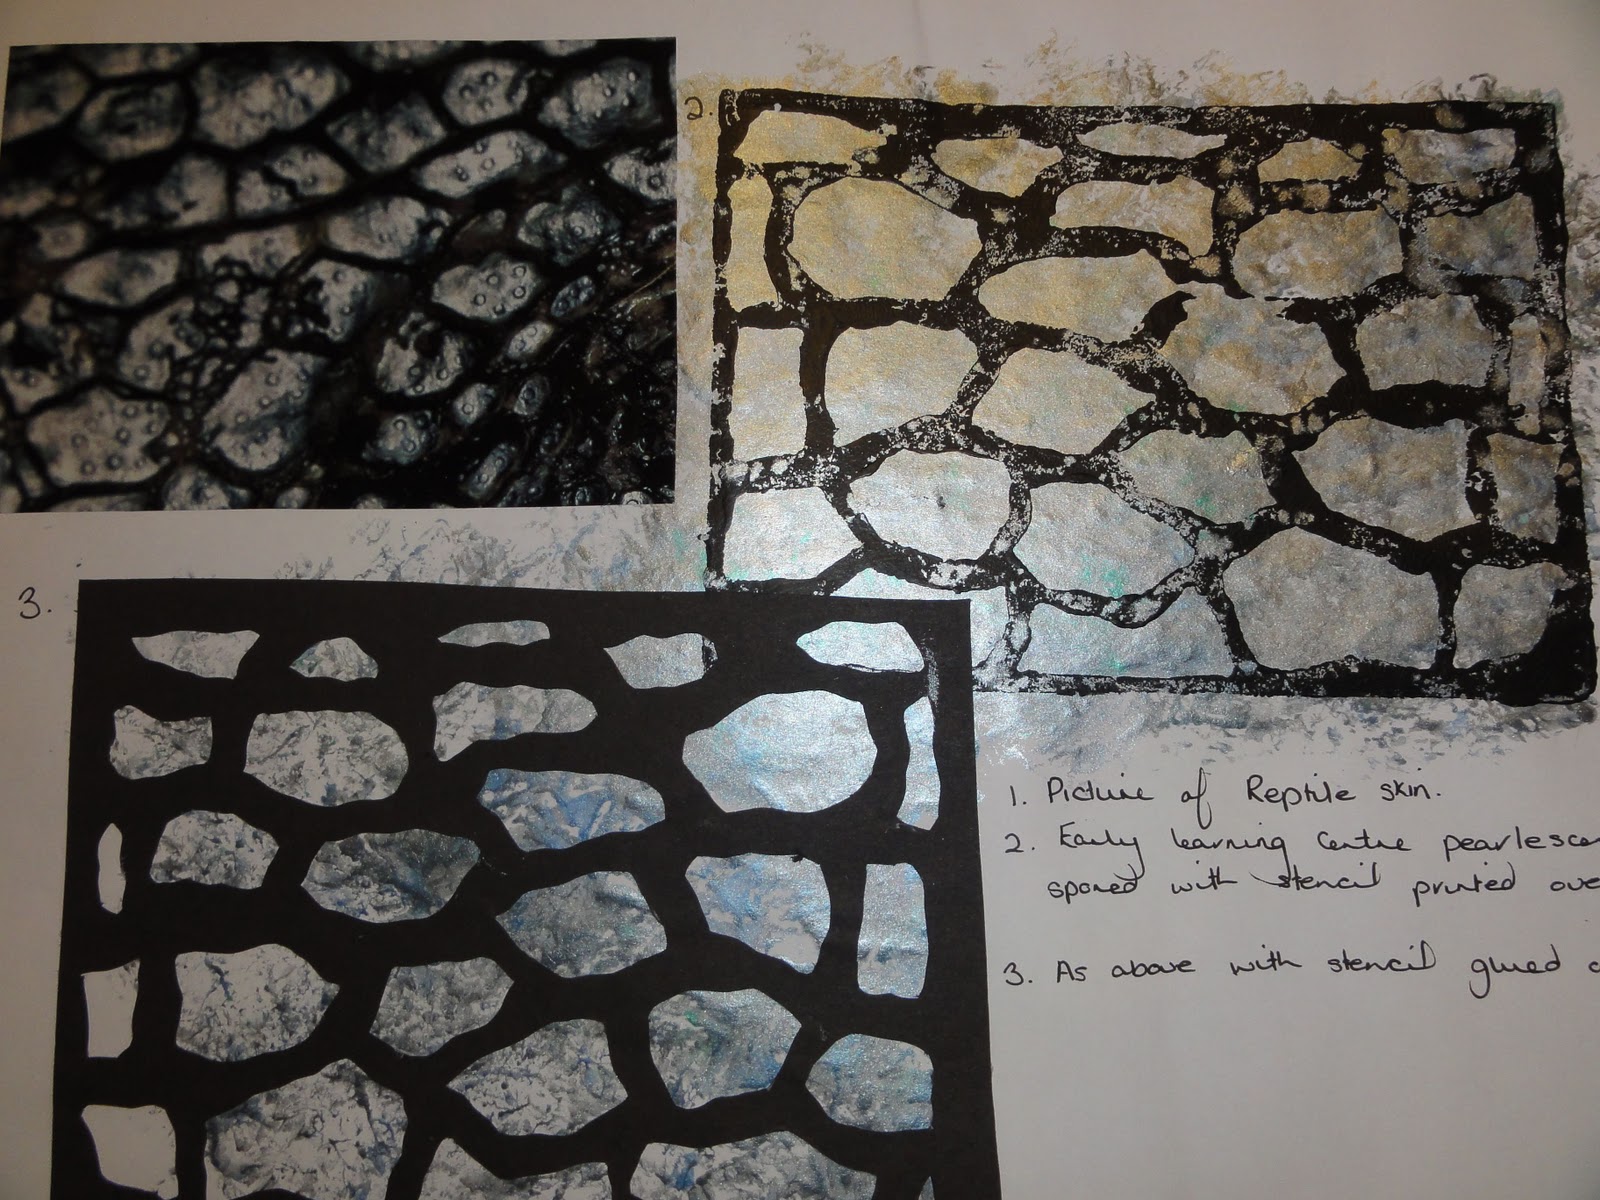
I used pearlescent paints and a stencil to create the idea of the reptile skin. I am pleased with the results of this. The resulting sample would be attractive if worked on a piece of cloth, particularly one with a shine such as a satin or perhaps silk. I would like to try this again perhaps adding stitching to the black areas to press it down and to allow the pearlescent area to stand out in a slightly 3d effect.
On the next picture I used wax first to scratch off to reveal the texture and then as a resist. This is something that I haven't really tried before and would definitely
try again. I couldn't get the wax fine enough to give the texture that I was looking for when used as a resist, but with hindsight perhaps if I had used a knife to scrape off bits of wax and drawn with them it would have been better.
Exercise 2 asked for textures taken from actual objects. I think I really benefitted from being able to see and feel the objects in this section.


The above was taken from some fungus growing in my garden. I started by doing a couple of pen and pencil sketches to try to get an idea of the texture before doing some potato prints. I wasn't very pleased with the result of this as it was to flat and I don't think it described the texture well at all. After this I went on to squeeze some acrylic pain in a loose way on to an old credit care before scraping it on to the paper. I think this describes the texture very well and makes an interesting image. It would be interesting to attempt to get this effect by stitching into fabric and pulling the stitches tight so that it would hang in this way.

The above photograph was taken of some rust on an old wheelbarrow in my garden. I painted onto a tyvek envelope before applying heat to see if that would give the effect that I was looking for. I felt it worked well but wasn't enough on its own so I added bits of it to some painted hessian which had melted was distressed in clingfilm applied and stitched. I am fairly please with the overall effect.


The above were of some attempts I made to describe the texture of some shells from my collection. I used coloured pencils, brusho paints tyvek and 3d fabric paints.
I love the source material and how well you've captured the textures.. fabulous ~Fiona
ReplyDelete